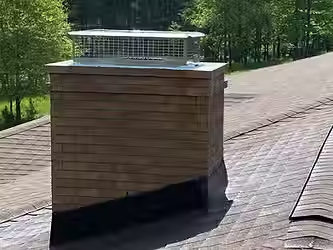
Homeowner Guide to Chimney Flashing Repairs
Updated: Oct 13
A chimney leak rarely starts with a dramatic ceiling stain. More often, it begins with a small damp spot in the attic, a musty fireplace odor after rain, or paint bubbling near the chimney wall. This homeowner guide to chimney flashing explains why that narrow band of metal where the chimney meets the roof deserves attention before a minor opening becomes damaged framing, rotten roof decking, or expensive interior repairs.
What Chimney Flashing Does
Chimney flashing is the metal system installed at the joint between your roof and chimney. Its job is simple: direct rainwater away from the chimney and onto the roof surface so it can drain properly. The job is not simple in practice. This area handles water flowing down the roof, wind-driven rain, seasonal temperature changes, and movement between the roof structure and masonry.
A properly flashed chimney uses several pieces working together. Base flashing runs along the lower edge and sides of the chimney. Step flashing is layered into the roofing along the sides so water moves down each shingle course instead of behind it. Counterflashing is installed into the mortar joints of a brick chimney and overlaps the base flashing. At the uphill side, a cricket or saddle may be needed to split heavy water flow around a wider chimney.
The counterflashing is especially important on brick chimneys. Caulk alone is not a permanent substitute for metal properly set into the masonry. Sealant has a place in a repair, but it cannot make up for missing flashing, loose masonry, or an improper roof-to-chimney connection.
Signs Your Chimney Flashing May Be Failing
Water does not always show up directly below the leak. It can travel along framing members or behind walls before becoming visible. That is why homeowners should pay attention to changes after heavy rain, especially around an older chimney.
Common warning signs include staining on ceilings or walls near the chimney, peeling paint, damp attic insulation, a musty smell around the fireplace, or visible rust on flashing. You may also notice cracked or separated caulk, lifted shingles beside the chimney, loose metal edges, or mortar joints that have worn away where counterflashing should be secured.
Inside the firebox, white powdery residue on brick can also point to moisture moving through the masonry. This material, called efflorescence, does not prove flashing is the source, but it does mean the chimney needs a closer look. Spalling brick, where the face of the brick flakes or breaks away, is another concern because repeated moisture exposure can weaken the chimney over time.
A leak that happens only during wind-driven rain often points to side flashing, counterflashing, or gaps at the upper corners. A leak after long, steady rain may involve a worn crown, damaged roof materials, or water backing up behind the chimney. The pattern matters, which is why a proper inspection should look at the full chimney system rather than applying sealant to the first suspicious spot.
Chimney Flashing Is Only One Part of Leak Control
Homeowners often hear “flashing leak” when the actual problem involves several conditions. The flashing, chimney crown, mortar joints, roof shingles, chase cover, and attic ventilation can all affect how water moves around the chimney.
For a masonry chimney, the crown is the concrete or mortar cap at the top. Cracks in the crown can allow water into the chimney structure, where it may appear much lower down. For a prefabricated chimney with a metal or wood chase, the chase cover can rust or hold water if it is poorly sloped. Damaged mortar joints may allow water behind counterflashing even when the metal itself is in fair condition.
This is why a homeowner should be cautious about a quick diagnosis from the ground. A repair that only covers visible gaps may slow the leak for a short time while water continues entering through deteriorated crown coating, failed repointing, or a roofing issue above the chimney.
When a Repair Is Enough and When Replacement Makes Sense
Minor flashing problems can sometimes be repaired. A contractor may be able to resecure a loose section, replace deteriorated sealant at appropriate joints, reset a small area of counterflashing, or correct a limited shingle-to-flashing issue. This can be a sensible option when the metal is sound, the masonry is stable, and the surrounding roof is in good condition.
Replacement is usually the better long-term choice when flashing is rusted through, bent, poorly installed, or repeatedly patched. It may also be necessary if the counterflashing was never cut into the mortar joint or if the roofing around the chimney needs replacement anyway. Reusing weak flashing during a roof replacement often creates a preventable leak point later.
Material choice depends on the chimney, roof, and budget. Galvanized steel is common and cost-effective, but it can eventually corrode. Aluminum resists rust but should be selected carefully around certain masonry and roofing materials. Copper is durable and has a long service life, though it comes at a higher cost. The best material is not always the most expensive one. Correct installation, proper overlap, and good integration with the roof are what keep water out.
What a Proper Chimney Flashing Inspection Should Include
A reliable inspection begins with the roof-to-chimney joint but does not end there. The contractor should examine whether the flashing is layered correctly with the shingles, whether counterflashing is secure in the brick mortar joints, and whether any sealant has cracked or pulled away.
The chimney itself should also be checked for loose brick, missing mortar, crown cracks, damaged caps, and openings around flue liners. On the roof, cracked shingles, nail pops, poor drainage, and worn underlayment can imitate a flashing failure. In the attic, moisture marks and damaged wood may help identify the direction and age of the leak.
Ask for a clear explanation of what is causing the problem, what must be repaired now, and what may need attention later. Good repair work should not leave you guessing whether the contractor addressed the roof, the chimney, or both. Before work begins, you should understand the scope, material choices, expected timing, and price.
Avoid These Short-Term Fixes
A tube of roof cement can be useful for a limited emergency repair, but it should not be treated as a permanent flashing system. Smearing tar over the chimney-roof joint can hide the details needed for a real diagnosis, trap water, and make future repairs more difficult. It can also create a rough, unfinished appearance on a brick chimney.
Homeowners should also avoid climbing onto a steep, wet, or aging roof to inspect flashing closely. Chimneys are often located near roof peaks where footing is poor. Older brickwork can be unstable, and leaning a ladder against a damaged chimney may cause further problems. A ground-level visual check after a storm is reasonable. Roof-level repair work is better left to trained, insured professionals.
Do not assume a waterproof coating alone will solve the issue. Masonry water repellents can help protect sound brick from moisture absorption, but they do not repair missing mortar, open flashing joints, or a cracked crown. Water has to be directed away from the chimney first.
Protecting Your Chimney After Flashing Repairs
Once flashing is repaired or replaced, routine attention helps preserve the work. Keep gutters clear so roof water does not back up near the chimney. After major storms, look for displaced shingles, fallen limbs, or flashing that appears lifted. Watch interior walls and ceilings for recurring stains, particularly during the first few heavy rains after a repair.
Annual chimney inspections are also a practical way to catch changes before they become larger repairs. For wood-burning fireplaces, regular cleaning and inspection address creosote buildup as well as visible concerns with the chimney structure. A chimney that is safe to use and dry inside will generally last longer than one that is repeatedly exposed to hidden water intrusion.
For South Carolina homeowners, heat, humidity, hard rain, and changing weather can be rough on roofs and masonry. Coles Chimney and Brick Repair LLC evaluates chimney leaks with the full system in mind, including flashing, crowns, mortar joints, chase covers, and the condition of the surrounding masonry.
If you see a new stain after rain or suspect water is getting in around the chimney, do not wait for the next season to see if it gets worse. A careful inspection now can protect the roof, the chimney, and the rooms below it.


Comments